Laser
|
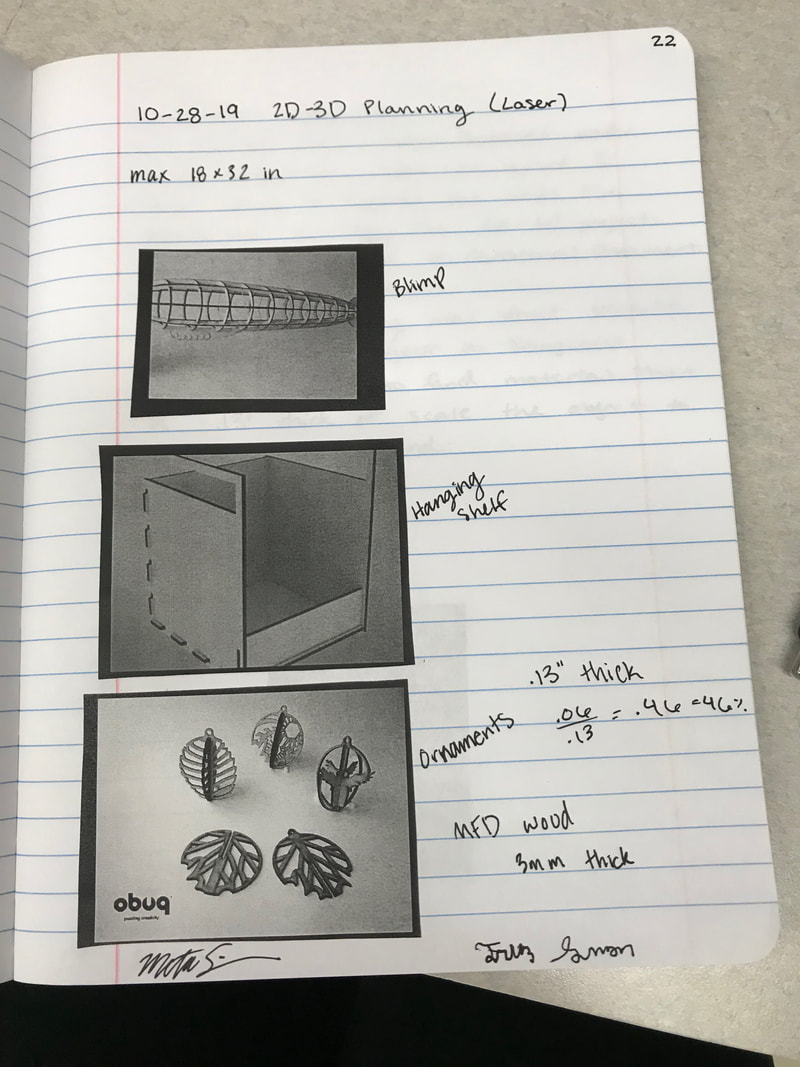
Research for notebook, water bottle, and 2D - 3D object.
|
Creation in Illustrator

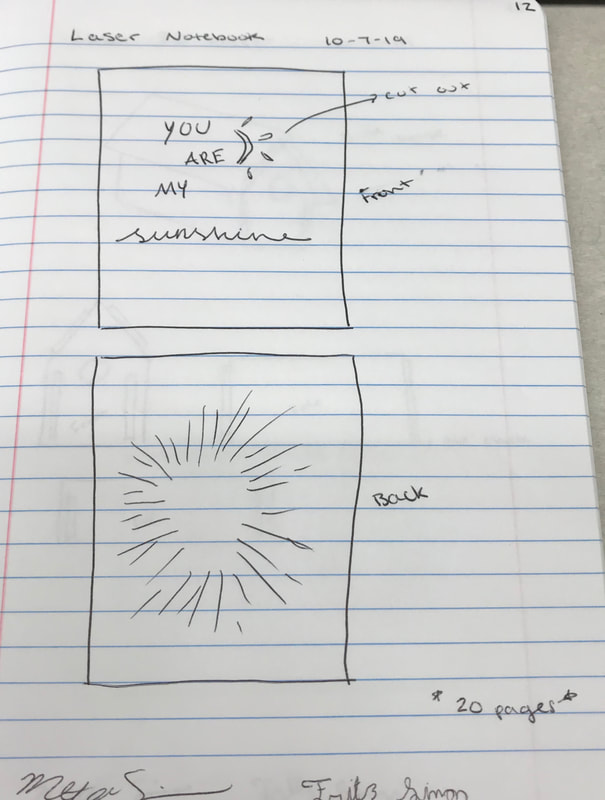
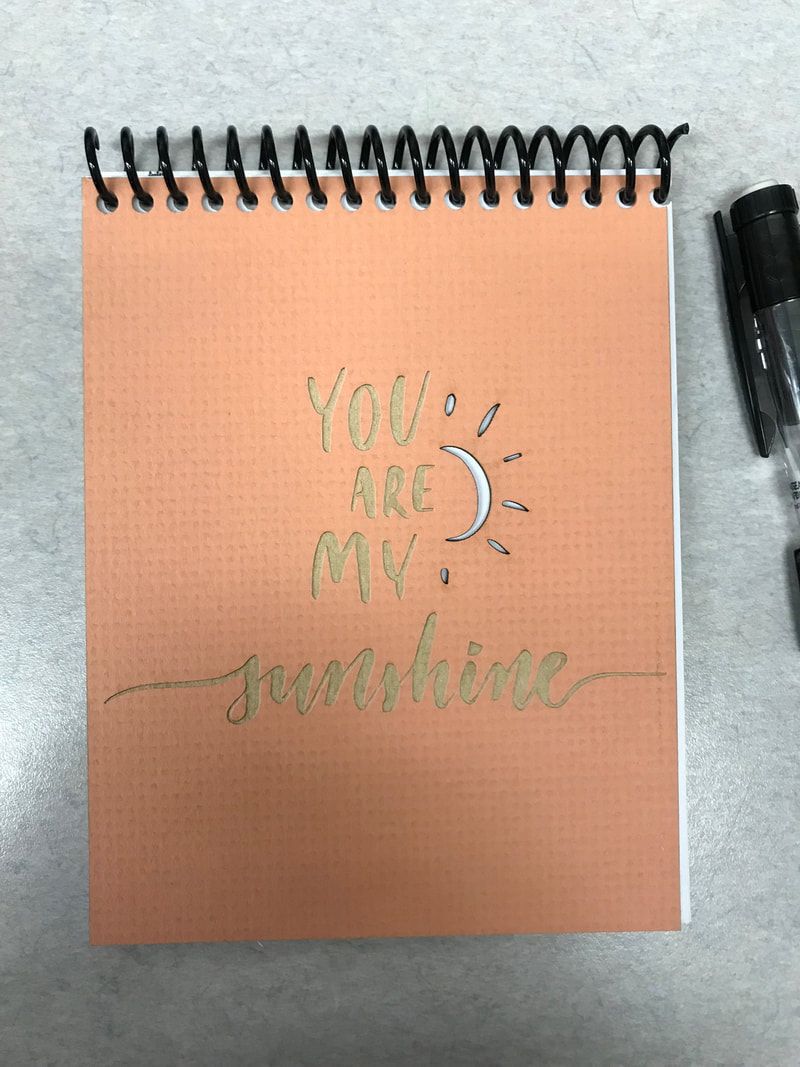
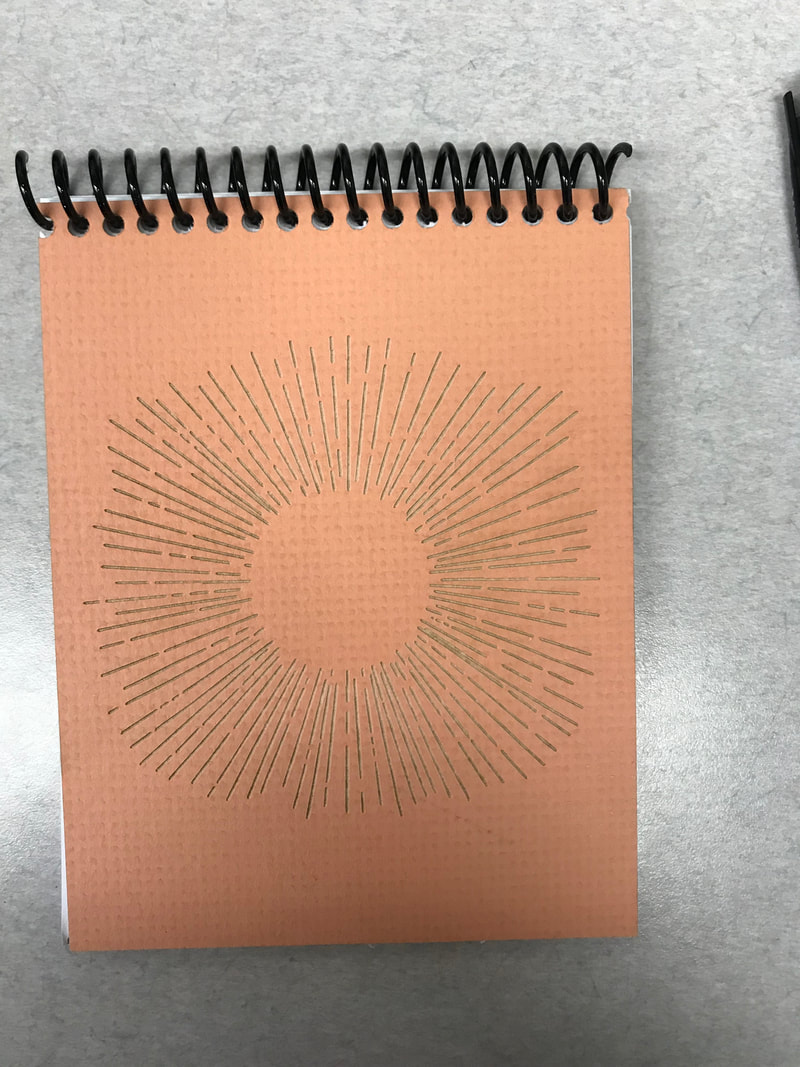
Final design for the notebook. I found the quote and sunbeams on Google Images and imaged traced each. Each rectangle around the design is 4.25 in. x 5.5 in..
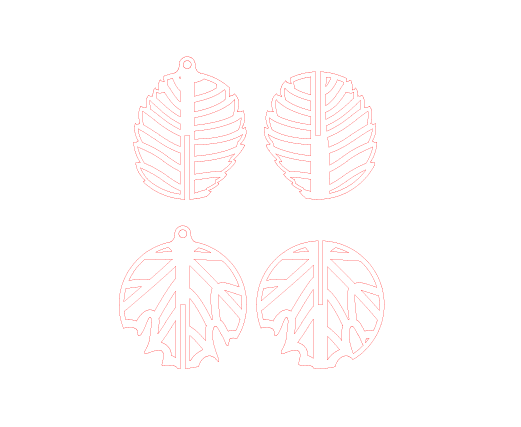
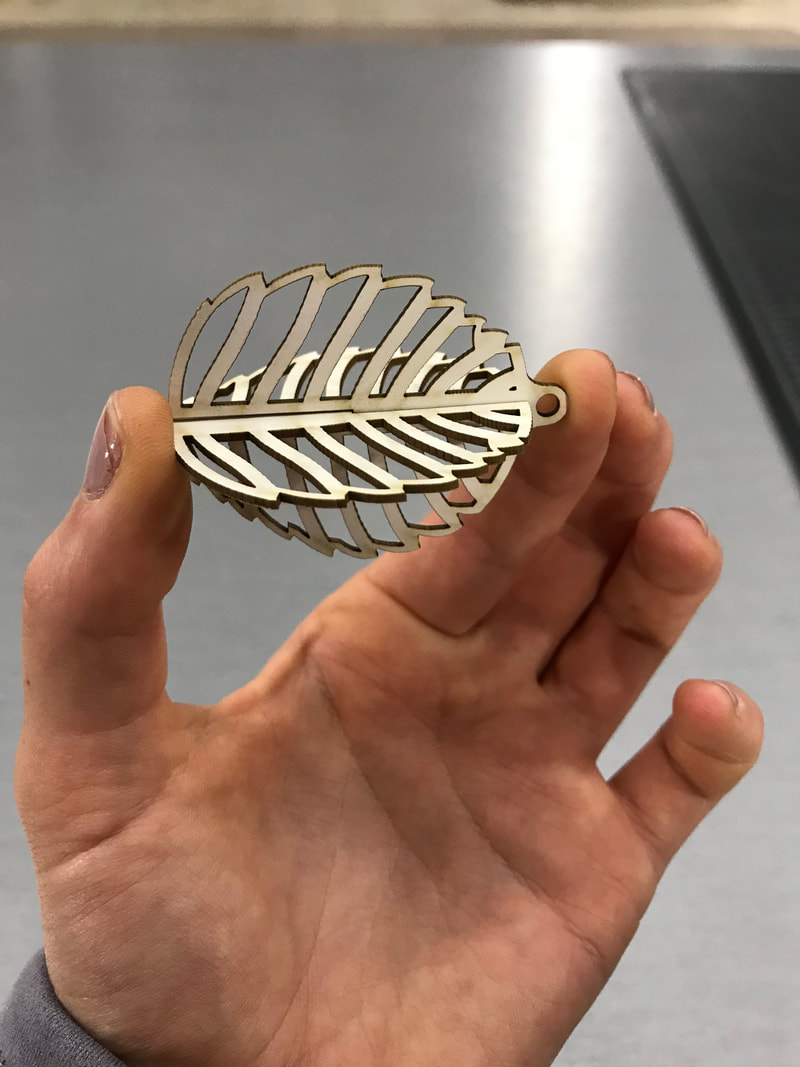
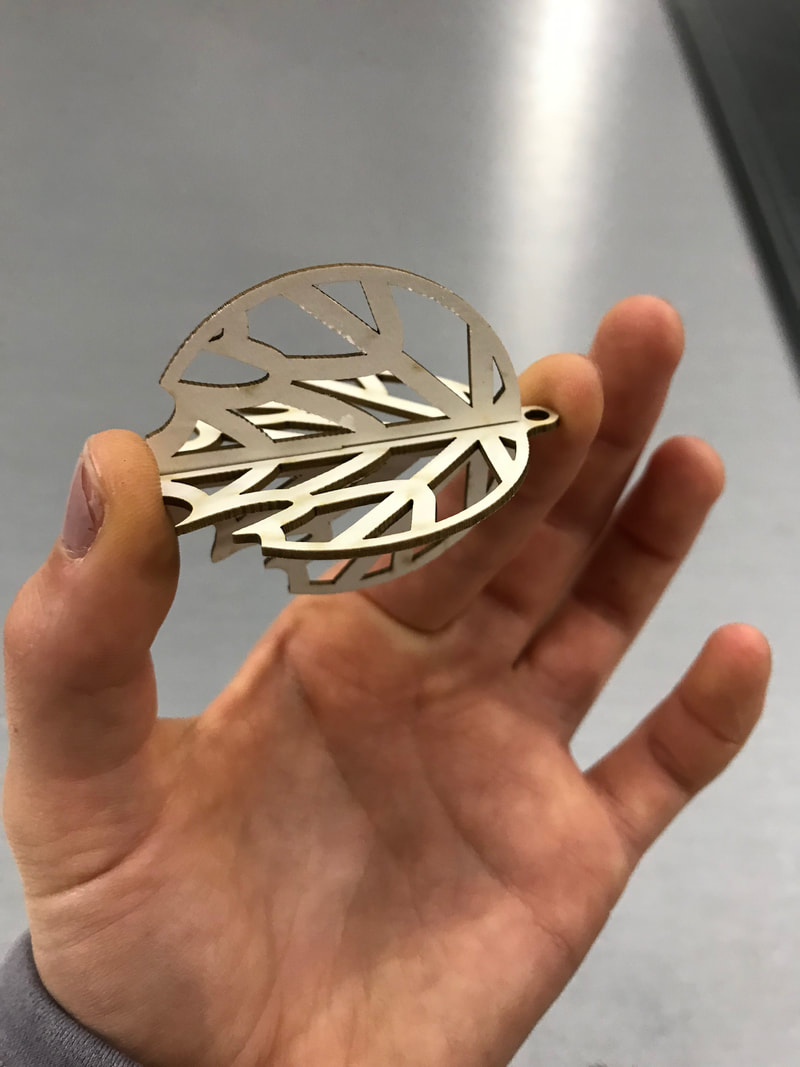
Final design for the 2D - 3D object. I found the designs on Thingiverse so they easily copied over into Illustrator.
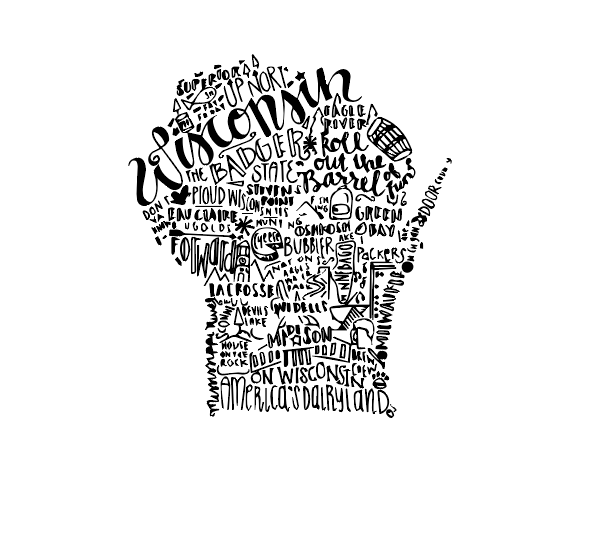
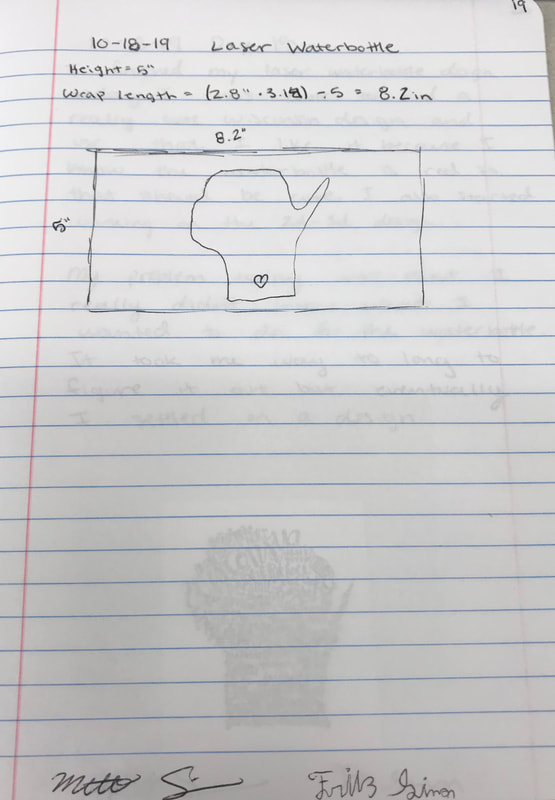
Final design for the water bottle. Similarly to the notebook, I found this image on Google and imaged traced it in Illustrator. It's important the design is no larger than 5 in. x 8.2 in..
Using the Laser
Notebook
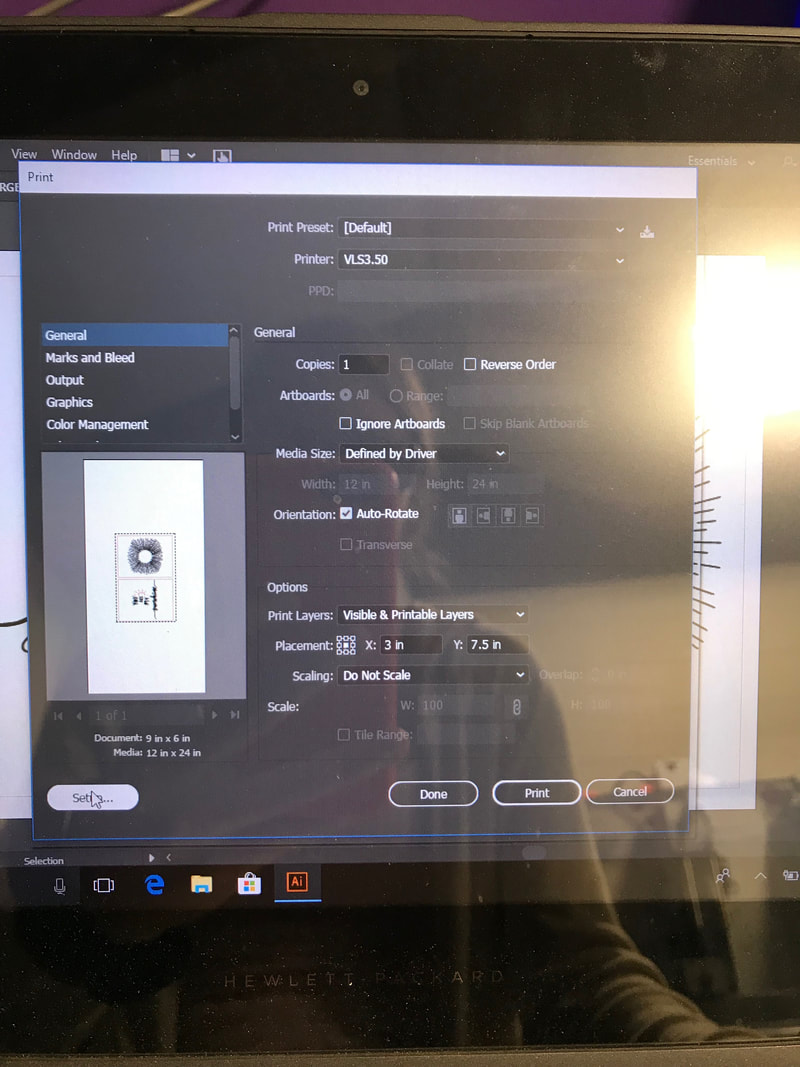
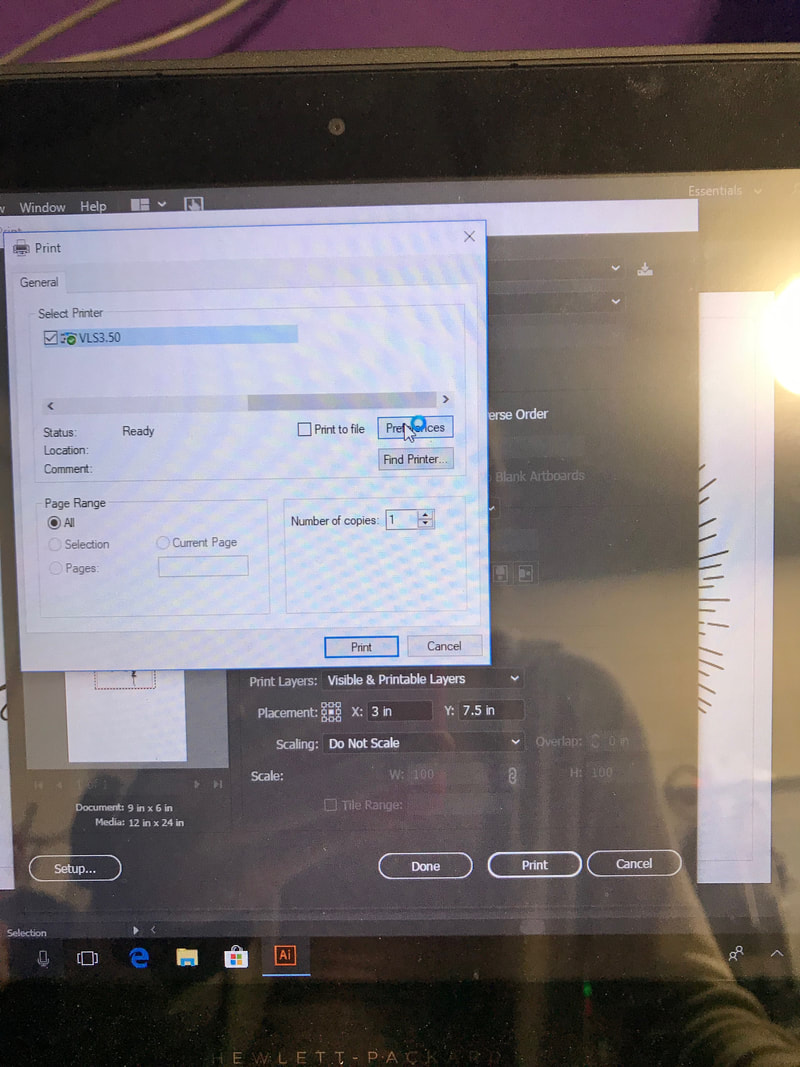
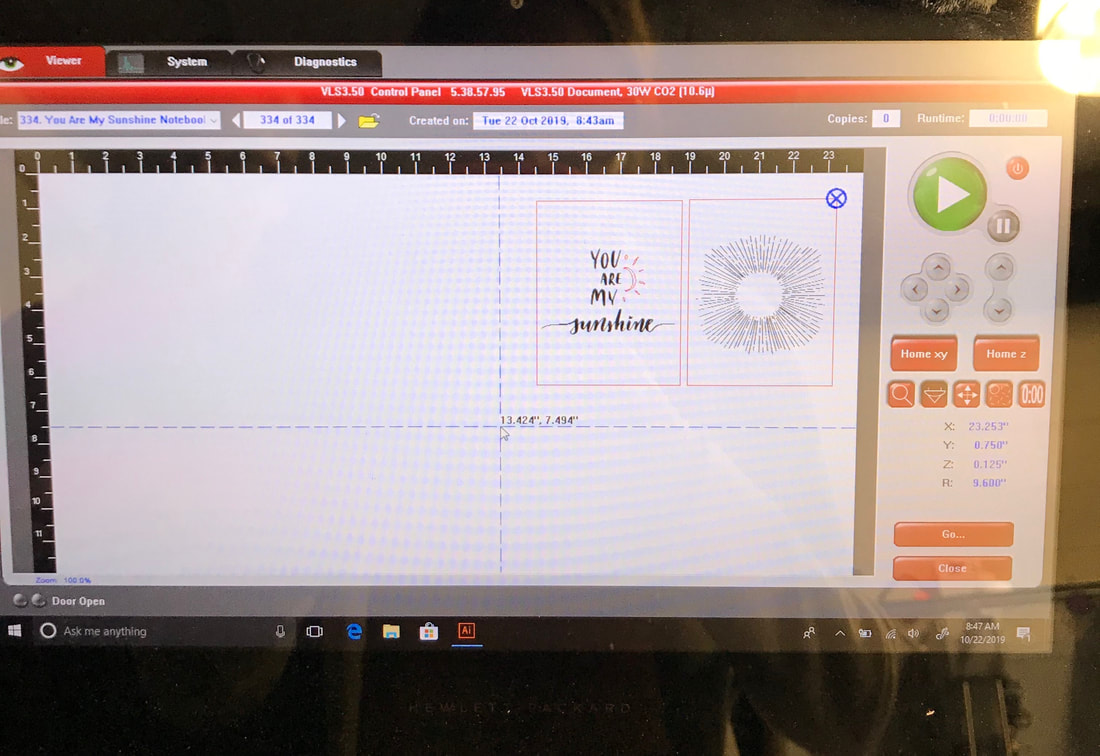

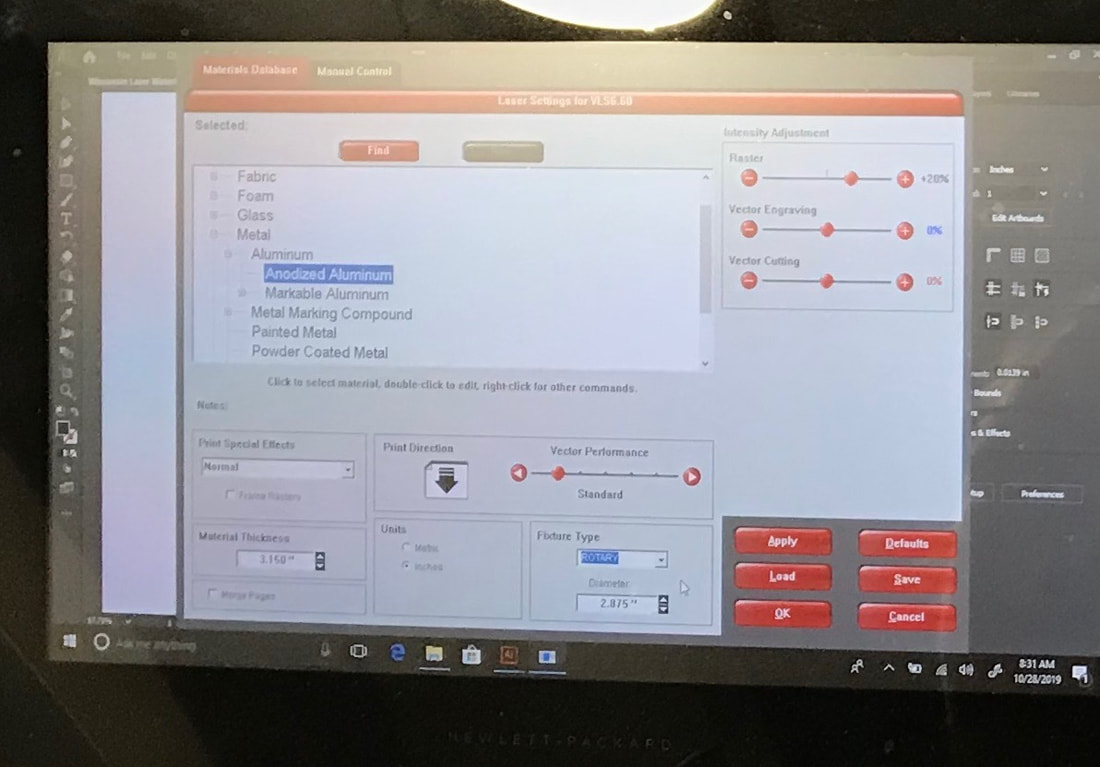
Open Illustrator and 'print' the design. Make sure the correct laser is selected as the printer. Then go into preferences and enter the thickness and type of material (if using the small laser make sure to change the speed to 16%). Then open UCP and position the design so that it fits onto the material. Make sure the laser is turned on and the vent switch is flipped. Once this is done, press the green play button (with laser lid closed) and the design will cut out!
2D - 3D Object
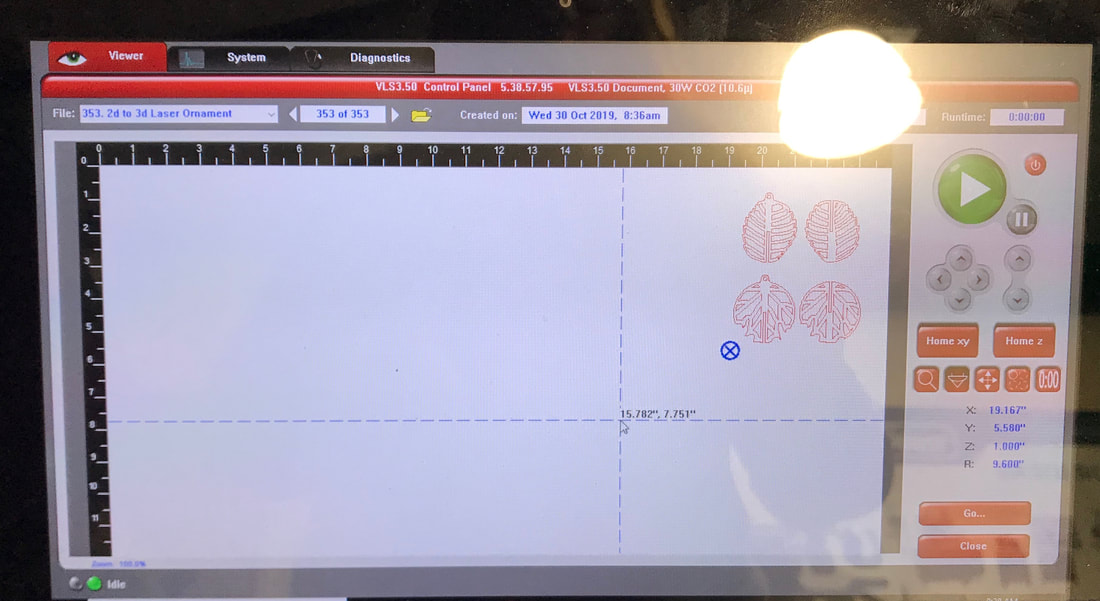
Follow the same process as the notebook to cut out the 2D - 3D object.
Water Bottle
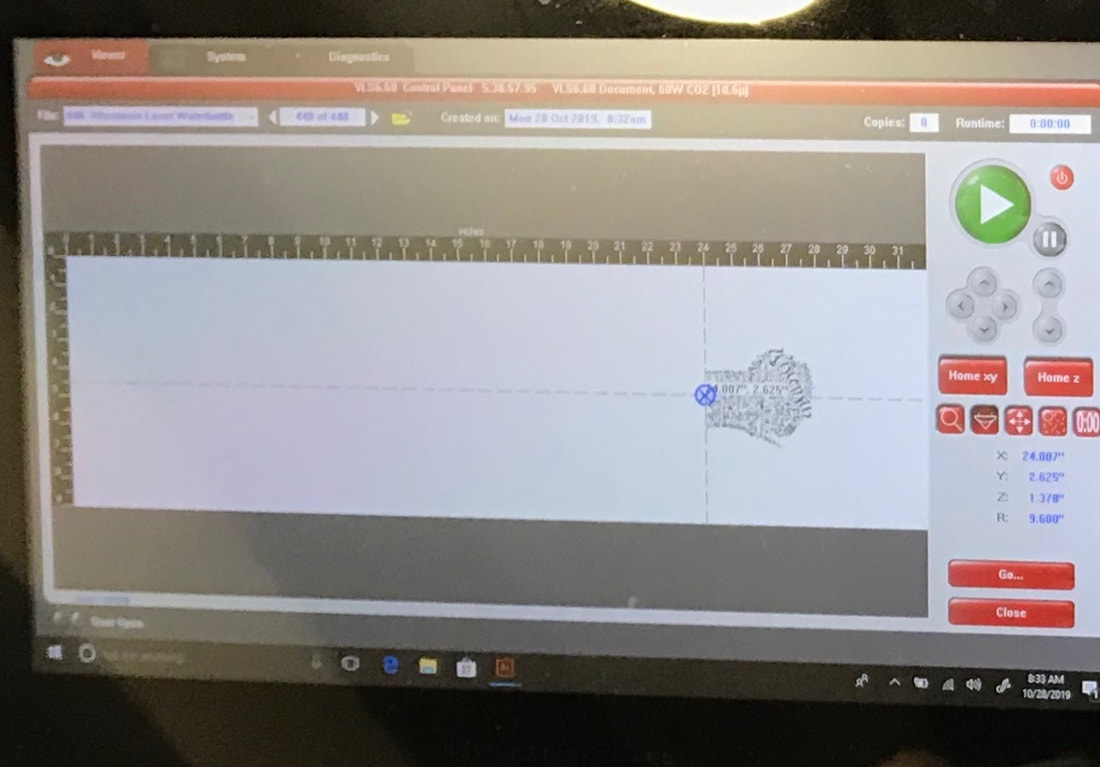
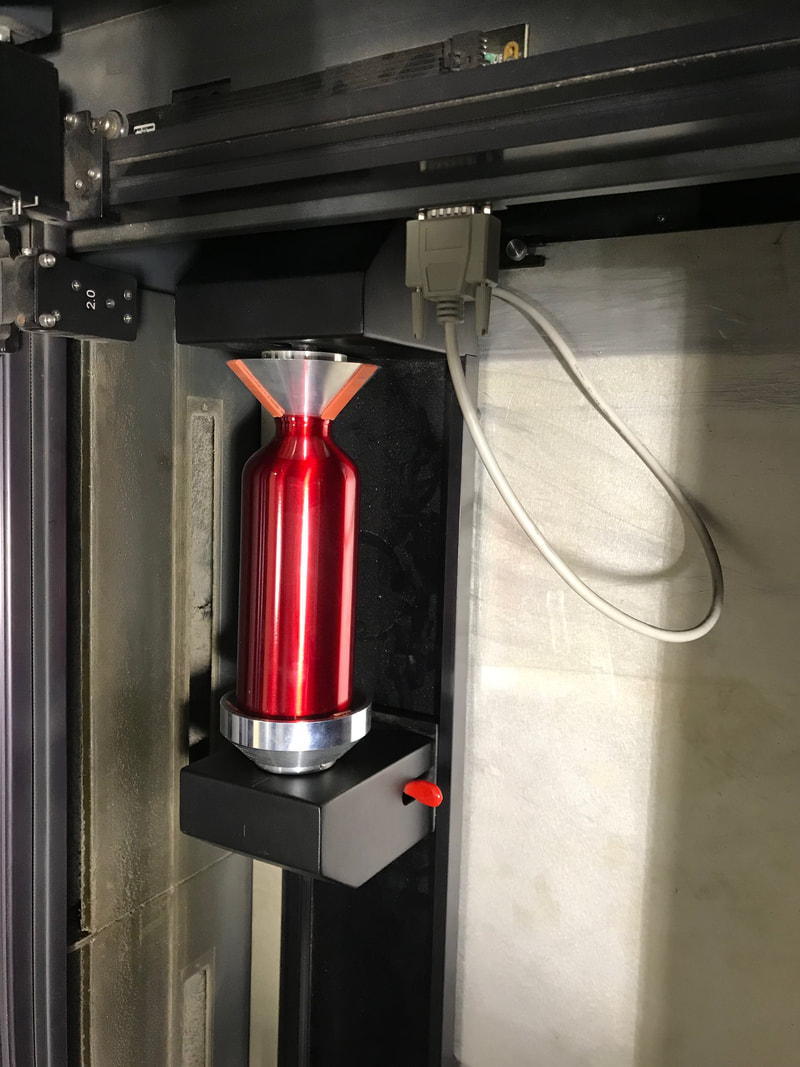
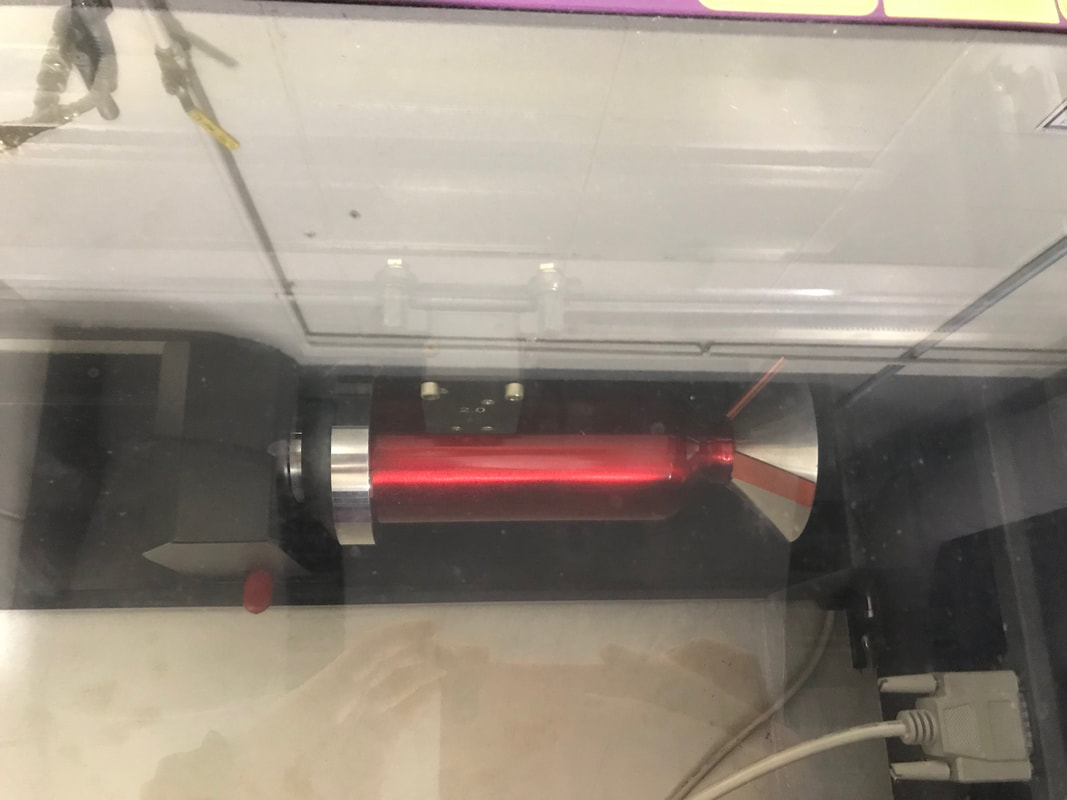
Use a similar process as the other projects. Instead of having a normal laser bed make sure to put the rotational jig into the laser. This means the design will need to be rotated to match the water bottle's position.
Finished Projects
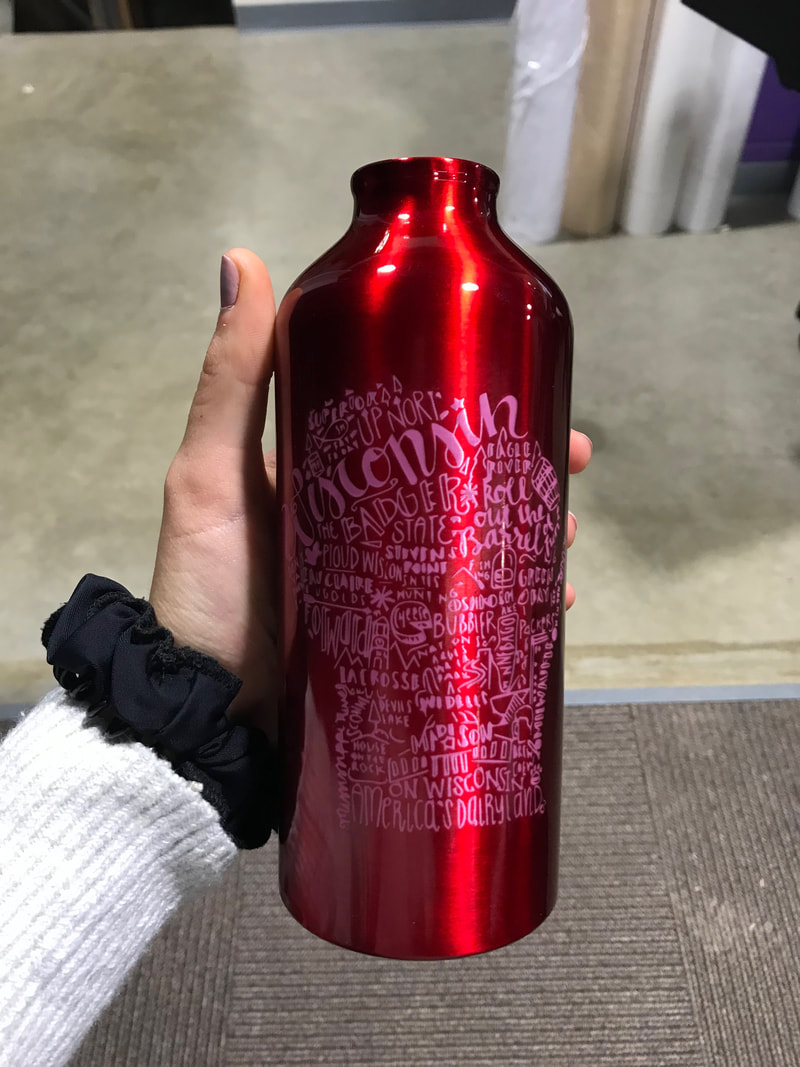
Water Bottle
|
|
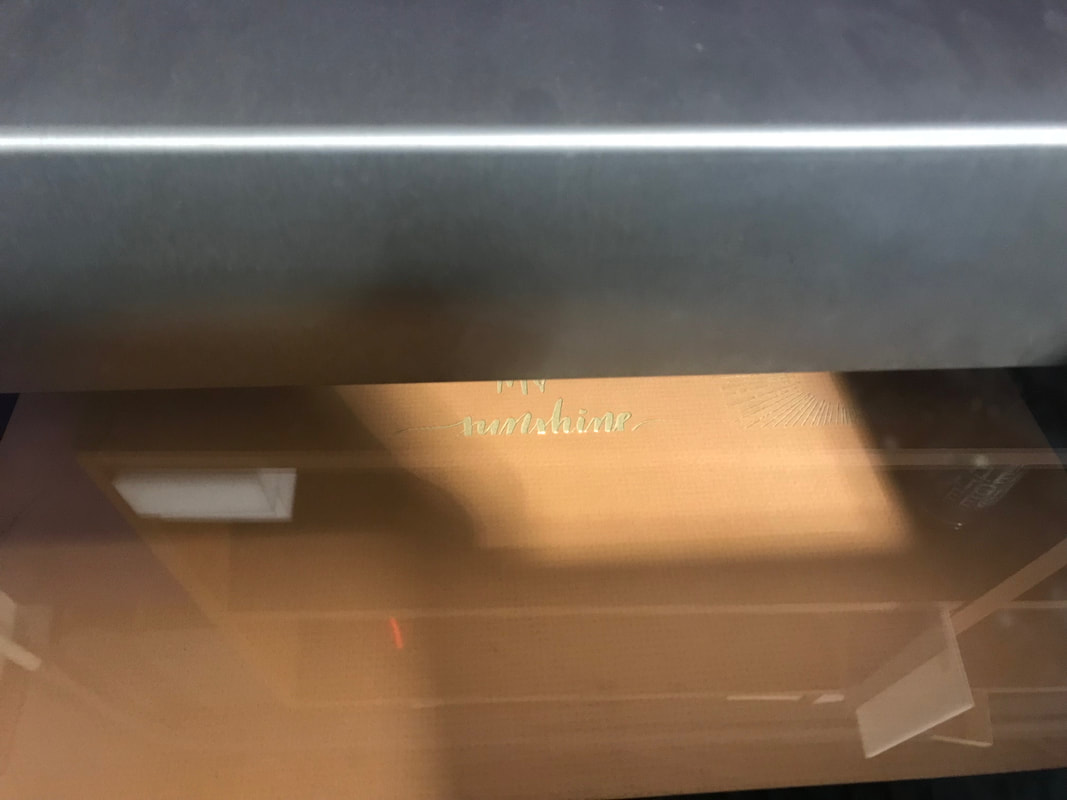
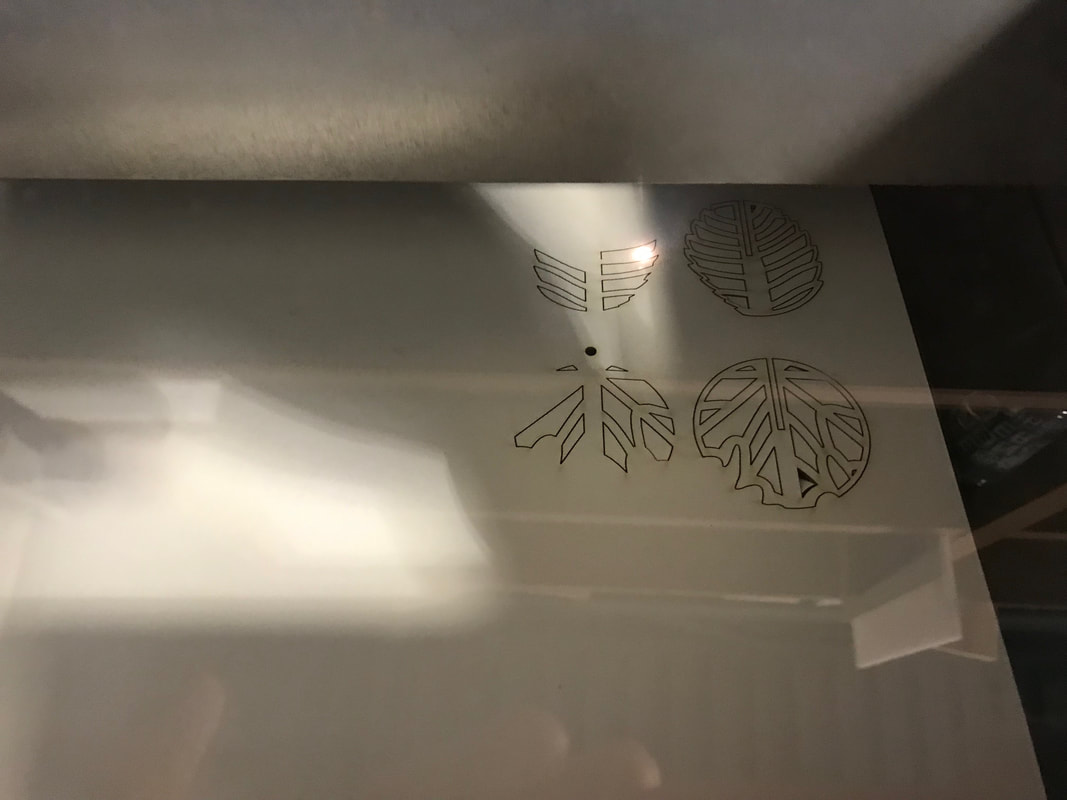
2D - 3D Ornaments
|
|
Notebook
What I Learned...
The biggest thing during this rotation for me was how much more comfortable I feel using the laser. I also now realize how important it is to turn the speed down on the small laser. I did this for my notebook and it turned out really well, but I forgot to do it for my ornaments and they turned out okay but there is a little burning around the edges.
